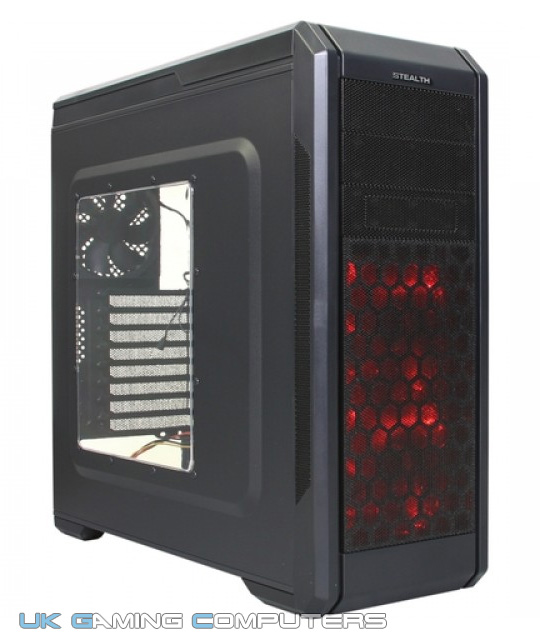
At UK Gaming Computers we have a new case to review - the Rosewill Stealth, what seems to be a case packed full of useful features but at a very reasonable price (pre order price seems to sit around the £65.00 inc VAT mark), all from a brand we’ve not used before which is very popular the other side of the pond. We were obviously very interested in having a look at this case and seeing if it was a good as it sounded on the spec sheet.
As with all cases (well all the ones we seem to be reviewing at the moment) the Rosewill Stealth arrived in a rather plain brown cardboard box, in fact it’s probably the least informative case box we’ve ever seen, no specs at all, just a picture of the case and some diagrams of the removal parts. Inside you have the usual plastic bag covering the case, along with the foam inserts to support the case in transit. With the case you also get the obligatory manual, a bag of cable ties and various different screws.
Even with the lack of information on the box, once we had the case out on the workbench we immediately took a shine to it, this may have been partial to do with looking up the specs online and seeing the price, but the first impression was good.
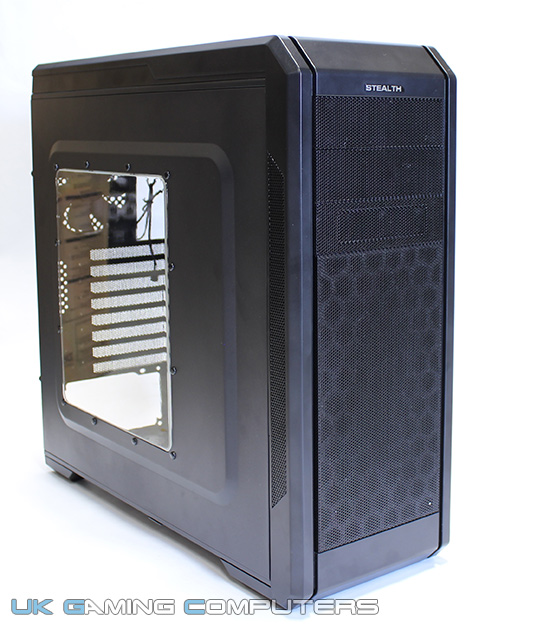
The case is constructed of mainly steel with some plastic and mesh sections, looks wises it’s certainly not the most striking of cases, in fact it’s rather plain looking, however, you could tell that it was solid and well built, overall it looks like a very good functional case and we were hoping not to be disappointed once we had an even closer look.
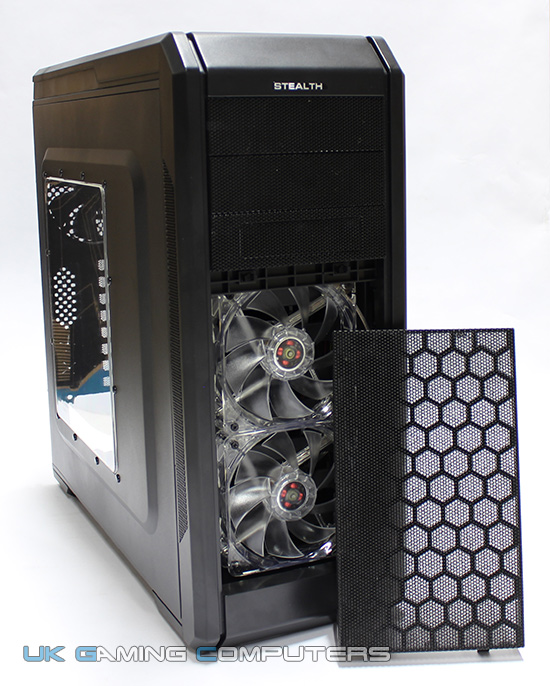
At the front of the case you have the name - Stealth - set just above the optical drive, below the name is an all mesh front, which should provide good airflow into the case, keeping your components nice and cool. The top part of the mesh is made up of three covers for optical disk drives or other fittings for 5.25” bays, the bottom part of the mesh is an easy to remove dust filter, when removed this shows the preinstalled two red led 120mm fans. The dust filter easily clips in and out of place making the task of keeping your PC dust free incredibly easy.
From looking at the website specs we were told that a 240mm liquid cooling radiator could be fitted at the front of the case where the two 120mm fans are installed, though after closer inspection it soon became clear that this would simply not be possible, unless of course you took an axe to the case. There simply isn’t room to fit a radiator at the front without major modification and you would probably still end up with the radiator sticking out the front of the case, not something you would want to see on any PC. Another thing we found quite strange was the mounts to fit a single 140mm fan at the front of the case, as these would mean removing the existing two 120mm fans, we really couldn’t see why anyone would want to use these.
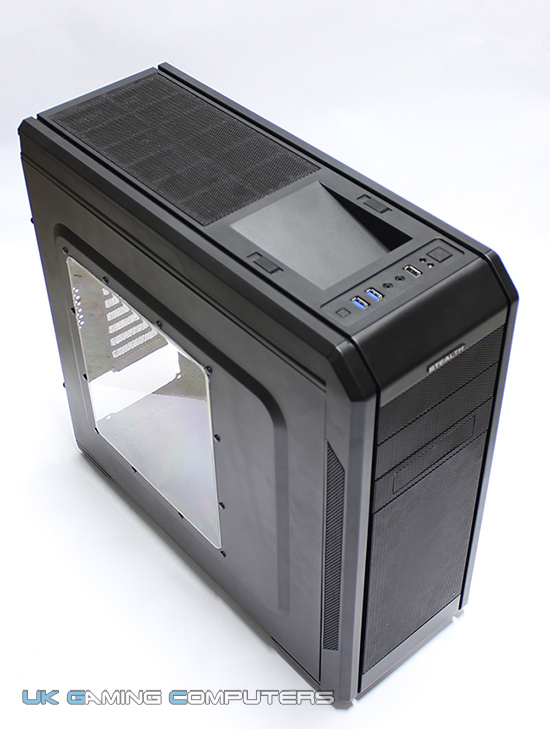
At the top of the case you have the usual connections and switches that we would expect at the front on a PC. You have the power button, reset switch, power LED and HDD activity LED, along with the headphone and microphone sockets and you also have one USB 2.0 port and two USB 3.0 ports. Another feature on top of the case is the slide in hard drive tray that will fit either a 3.5” or 2.5” drive, either side of this you also two fans controllers which will support two fans each. Further back you have another easy to remove dust filter that clips into place above a 120mm fan, with mounts to fit a second 120mm fan as well.
Again the website specs state you can fit a 240mm liquid cooling system in the roof of the case, though this time it should actually be possible. You won’t be able to fit too deep a radiator in the roof as it will need to fit directly above the motherboard, with the fans on top in a pull configuration. If you do intend to use the top part of the case for a liquid cooler we would recommend doing some investigation first on the components you want to use, as any radiator will need to be small enough to clear any heat sinks or RAM slots on the top of the motherboard.
The side panels of the case are solid steel, with a nice large window in one of them to show off the inside of the PC. The back of the PC has another 120mm exhaust fan and eight expansions slots all with removable covers. Finally the bottom of the PC has a dust filter to cover the intake for the power supply unit, if you wish to mount it upside down so that is sucks in air directly off the floor! You also have another dust filter covering the mounts for another 120mm fan that can be attached to the bottom of the case.
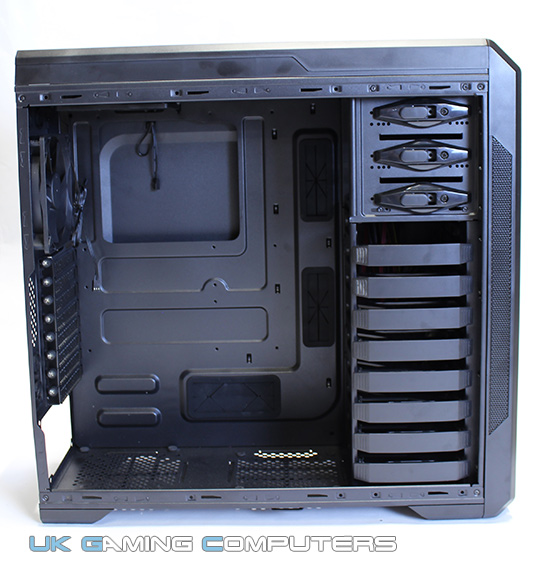
Inside the case you have a large area for a full ATX motherboard, with a generous cut out in the motherboard tray to access the back of the motherboard if fitting an aftermarket processor cooler. There is some room behind the motherboard tray for cable management, with plenty of hooks to use for cable ties, though we did feel this space could be larger. There are a further three routing holes in the case for cable management, each with their own cover, to keep everything nice and tidy.
On the right hand side of the case, you have the three 5.25”bays at the top, with the bottom holding a mount for a 3.5” or 2.5” hard drive, the 5.25” all have a quick release clip, these are made of plastic buts does have not the most solid mechanism. Below these you have a hard drive cage with trays to fit eight 3.5” or 2.5” hard drives. The trays are plastic and not of the best quality but they do fit into the hard drive bay quiet well and should be quite secure if you were transporting the case fully kitted out.
As the 5.25” drive bays and the hard drive cage covers the whole of the right hand side of the case and are all riveted into place, this reduces the room available for a graphics card, for this case you would struggle to fit any graphics card over 300mm, a small downside but only for those with a truly gigantic graphic card!
The final thing to do is to actually put the case through its paces by adding some components and having a look at the cooling of the PC. We proceeded to add the following components to the PC;
Gigabyte Z97-HD3 Motherboard
Intel Core i5 4690K
Stock CPU Cooler
8GB Corsair XMS3 1600MHZ RAM
Nvidia GTX 960 Graphics Card
Corsair CX500 PSU
500GB Seagate Barracuda HDD
Asus Optical Drive
For the tests we ran two programmes to monitor the Processor and Graphics card temperatures and performance, whilst running some benchmark applications. As there were two fans pre-installed at the front of the case we were expecting it to do a good job with keeping the inside nice and cool.
Checking the processor temperature we used a program called Core Temp, this was running whilst using Prime 95 to stress test the processor. The processor temperature when idle was hovering between 33 and 36 degrees C, after running Prime 95 for 20 minutes to place all cores in the processor under load, the maximum temperature recorded here was 73 degrees C.
After we had left the PC to cool down for an hour, so as to ensure the temperature readings would be back to normal, we then ran a couple of graphics card benchmarks to test the temperatures. To monitor the graphics card temperature we used a program called GPU-Z, when idle this temperature was around 32 to 34 degrees C. Using first Furmark, for a period of 20 minutes then running the bench mark test for 3Dmark11 we got a maximum temperature of 73 degrees C.
As Haswell processors have tended to run quite hot compared to their Sandy Bridge and Ivy Bridge predecessors we were quite please with the results here. We were also please with the performance with the graphics card, the Maxwell architecture in the current generation of Nvidia graphics cards is designed to be less power hungry and therefore cooler, but 73 degrees C under load was more than acceptable.
Conclusions
Aside from the rather ridiculous claim that you can fit a liquid cooling radiator in with the front cooling fans, the Rosewill Stealth is a very good all round case with plenty of benefits. Simply put, we really can’t fault much with the design or the functionality of the case. Normally, we would be very happy to point the finger and giggle but all fingers remained doing normal tasks.
Having built into the PC we would reiterate the need to choose your components carefully if you’re looking to fit a liquid cooling solution to the top of the case. An all enclosed solution like a Corsair H100i would fit without any problems, but any larger radiators might struggle to fit although if you are fitting monster radiators then they shouldn’t be going in a £65 case.
The only criticism you could level at the case would be that it’s a rather plain looking case and doesn’t stand out amongst the competition, however the functionality and price of the case more than make up for this. The build quality of the case is also very good, which can often be an issue with flashier budget cases. If you have £65 for a case and the looks are to your liking then there shouldn't be any other choice.
